
Customized design process:
STEP 1 – DESIGNING
From inspired sketches to meticulous craftsmanship and rigorous quality checks, our jewelry undergoes a transformative journey. Each piece embodies artistry and excellence.
STEP 2 – CAD/CAM
Designers translate their visions into precise 2D and 3D models using advanced CAD software.
This software enhances accuracy, streamlines manufacturing, and builds a digital database for each piece.
The design then transitions seamlessly to CAM software, which automates the manufacturing process, ensuring consistent quality and efficiency.
Step 3 – MODEL MAKING
Following CAD/CAM design and automation, casting transforms the digital design into a physical silver master model used for subsequent piece creation via rubber molds.
Step 4 – RUBBER MOULD
The rubber mold stage (vulcanization) allows for efficient production by enabling the creation of multiple identical pieces from a single design, preserving the original for future use. Materials range from natural rubber to silicone and metal.
Step 5 – WAXING / WAX TREE
After design, rubber molds create precise wax models for casting. These models are assembled and strategically positioned (treeing) for optimal casting efficiency.
Step 2 – CASTING
Skilled casters transform designs into reality through a complex casting process. Wax models are encased, heated, and filled with molten metal, revealing the final jewelry pieces after cooling and removal of the mold.
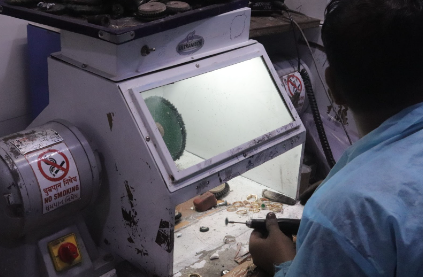
Step 7 – GRINDING
Following casting, fine irregularities (nubs) left from the process are removed using a motorized grinding machine. This ensures the gold piece's surface is perfectly smooth for the next steps.
Step 3 – FILING / ASSEMBLY AND PRE POLISHING
Following casting, meticulous filing removes excess metal and smooths surfaces. Next, components are assembled, often using soldering or lasers. Finally, a multi-step polishing process, including pre-polishing for diamond pieces, brings each creation to its dazzling brilliance.
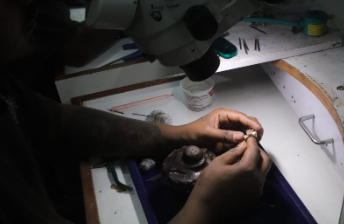
Step 4 – METAL SETTING
Skilled artisans secure gemstones through various techniques like prong, bezel, or pave settings, creating captivating designs and bringing the piece to life.
Step 5 – POLISHING
After stone setting, meticulous hand or machine polishing brings each piece to its final, gleaming state, ensuring captivating shine.
Step 6 – RHODIUM PLATING
This final step uses rhodium, a precious metal, to enhance shine and resist scratches and tarnish. For white gold, it intensifies the white color, while on yellow gold, it creates unique designs.
Step 7 – QUALITY CONTROL
Our meticulous quality control ensures each piece meets rigorous standards, employing precise measurements, thorough visual inspection, and rigorous mechanical testing.